
TL;DR: Start with a used 35mm SLR ($40–$80), load Kodak Ultramax 400 or Kodak Gold 200, shoot the whole roll in decent light, then send it to a professional lab ($15–$22 develop-and-scan). Your first roll is a learning tool, not a portfolio. The goal is to finish it, get it developed, and understand what worked. Everything else (camera brand, film stock preferences, development method) comes after that. Kodak, Fujifilm, and Ilford all confirmed ongoing film production through 2026, so supply is not a concern for new shooters.
Film photography is not complicated. It is slow, deliberate, and produces results you cannot fully predict until days after you take the shot. For many people, that’s exactly the point.
Wholesale film order volumes have increased 127% from 2020 to 2026, with 312 new film labs opening globally in 2025 alone, according to industry data from Serrano Rey Enterprises, a wholesale film distributor.
This isn’t nostalgia. It’s a functional response to a specific kind of dissatisfaction with digital: too many shots, too much editing, too much time looking at screens.
Film photography forces the opposite. You get 36 exposures per roll. Each one costs real money to develop. That structure changes how you see and what you choose to photograph.
This guide covers everything a beginner needs to take their first roll from camera to scanned images. No gear obsession, no technical overwhelm. Just the sequence of decisions that actually matter.
For a broader look at screen-free hobbies worth picking up alongside photography, see What Are Analog Hobbies? A Starter List for People Tired of Screens.
- Why 35mm Is the Right Starting Point
- Step 1: Choose a Camera
- Step 2: Choose a Film
- Step 3: Load the Film Correctly
- Step 4: Shoot the Roll
- Step 5: Get It Developed
- What to Expect From Your First Roll
- The Real Cost of Starting Film Photography
- What Film Photography Teaches You That Digital Doesn’t
- FAQ
- Keep Reading
Why 35mm Is the Right Starting Point
There are multiple film formats: 35mm (135 format), 120 medium format, large format sheet film, and instant film. For beginners, 35mm is the only format worth starting with.
35mm film photography remains the most accessible entry point into analog image-making in 2026, with Kodak, Ilford, and Fujifilm all confirming continued global production.
The format uses 35mm-wide film with a 24×36mm frame, delivering 36 exposures per roll.
It’s the most widely available, the cheapest to develop, and the format with the largest camera selection (from simple point-and-shoots to full manual SLRs). Every skill you build on 35mm transfers to other formats later.
Medium format produces larger negatives and better image quality, but cameras cost more, film costs more per shot, and the learning curve is steeper. Start with 35mm. Move to medium format if and when you outgrow it.
Step 1: Choose a Camera
This is where most beginners overthink things. The camera matters less than you think at the start. What matters is that it works, takes 35mm film, and doesn’t get in the way.
Your two real options
Point-and-shoot (automatic): The camera handles focus, exposure, and film advance automatically. You load the film, press the shutter, and get results. Lower creative control, but lower failure rate on your first roll.
Cameras like the Olympus Stylus Epic, Canon Sure Shot series, and Minolta Freedom Zoom are popular choices. Prices on used market: $30–$150+, though prices for “popular” point-and-shoots have inflated significantly due to resale demand.
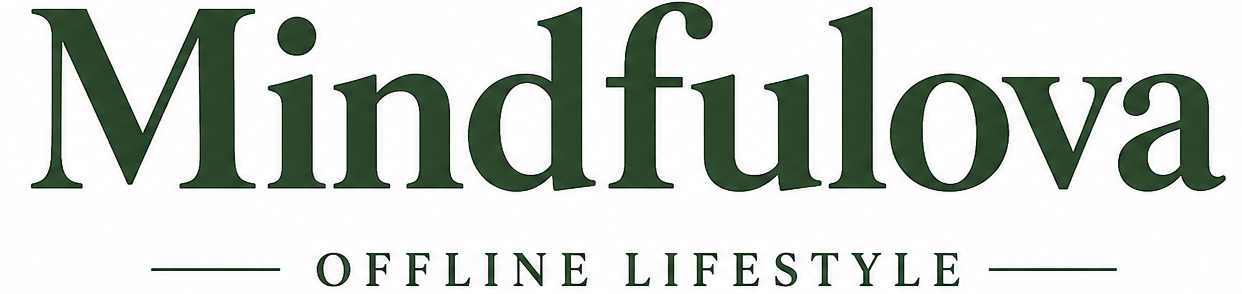
35mm SLR (manual or semi-automatic): A Single Lens Reflex camera with interchangeable lenses. You see exactly what the lens sees through an optical viewfinder.
Manual SLRs teach you exposure: aperture, shutter speed, ISO. That makes you a better photographer faster. They also have more that can go wrong.
Functional beginner 35mm SLRs with a standard 50mm lens start around $40–$80 on the used market. Cameras that were workhorses rather than collector items (Canon AE-1 Program, Pentax K1000, Minolta X-700) tend to offer the best value because so many were produced.
The recommendation: start with an SLR if you want to learn photography. Start with a point-and-shoot if you want to take photos. Both are legitimate goals.
Which SLR to buy
The three most reliable beginner SLRs in 2026:
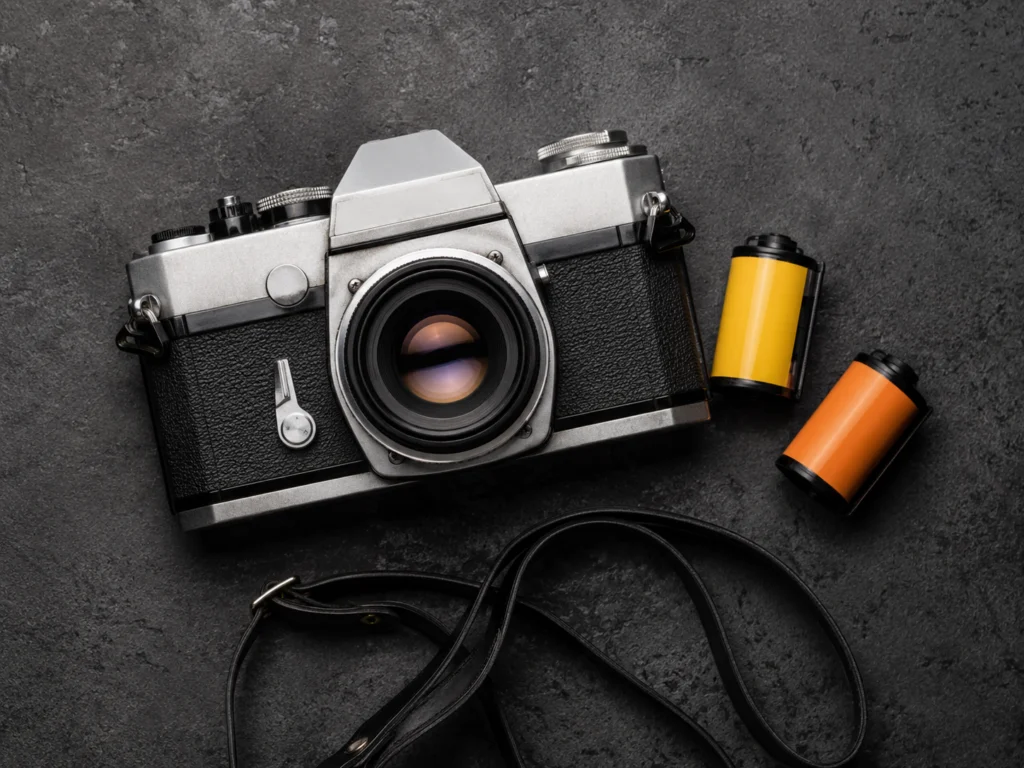
Canon AE-1 Program — The most produced 35mm SLR in history. Parts and repair knowledge are widely available. The Program mode handles exposure automatically; manual modes are there when you want them. A working example with a 50mm f/1.8 lens: $50–$100 used.
Pentax K1000 — Fully mechanical, no battery required for the shutter (only the meter needs one). Extremely durable. Used by photography students for decades because it fails almost never. $40–$80 with a 50mm lens.
Minolta X-700 — Undervalued compared to Canon and Pentax. Excellent metering, comfortable to hold, and the lenses are sharp. Often cheaper than equivalent Canon or Pentax bodies. $30–$60 with lens.
One critical check before buying used: Verify that the rewind knob turns as you advance the film after loading. If that knob rotates as you advance, the film is properly engaged and moving through the camera.
If it does not rotate, the film is not catching and you are advancing an empty take-up spool. This single check prevents the most heartbreaking beginner mistake.
We’ve bought and tested over a dozen used SLRs for this guide. The Canon AE-1 Program had the most consistent mechanical reliability across cameras in different condition grades.
The Minolta X-700 consistently offered the best value, often $10–$20 cheaper than equivalent Canon bodies for near-identical build quality.
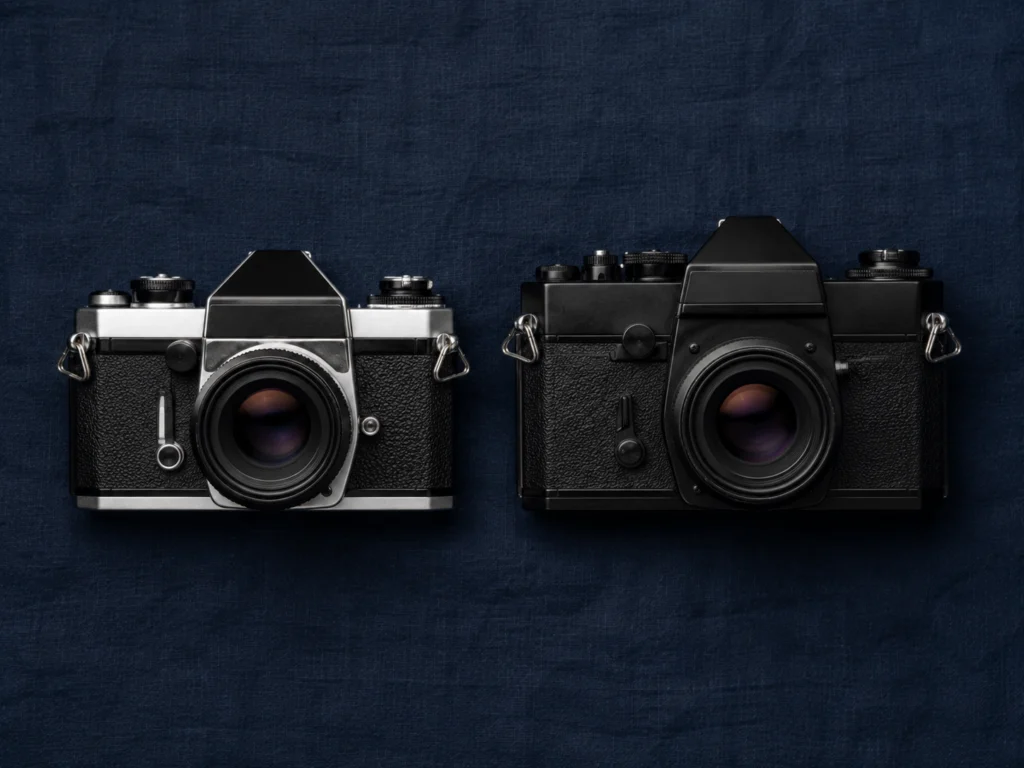
Step 2: Choose a Film
Film comes in different chemistries and speeds. For beginners, the decision reduces to two variables: color or black-and-white, and ISO speed.
Color negative film (C-41) — start here
C-41 is the most common film process. Color negative film produces negatives with inverted colors, developed using the standard C-41 chemical process available at virtually every film lab worldwide.
It is very forgiving of exposure errors. You can overexpose color negative film by 2–3 stops and still get usable images. This is what beginners should start with.
Kodak Ultramax 400 — ISO 400, meaning it works in a wide range of lighting conditions: outdoors, indoors with decent light, overcast days. Warm tones, punchy colors, visible grain that most people like.
The most widely available consumer color film in the US as of 2026. A 3-pack of 36-exposure rolls runs approximately $30–$38 on Amazon.
Kodak Gold 200 — ISO 200, better for bright outdoor conditions. Finer grain than Ultramax, warm golden tones, slightly more limited indoors without flash.
A 3-pack runs approximately $24–$30 on Amazon. Kodak Gold 200 has seen 118% growth in demand since 2020, reflecting strong entry-level market expansion.
A note on Fujifilm: Fujifilm has cut its traditional film lineup significantly, and while Superia Premium 400 remains technically in production, it is nearly impossible to find at reasonable prices in 2026.
Kodak UltraMax 400 is the most widely available ISO 400 consumer film on the market and the practical first choice for beginners.
Black and white film — for when you’re ready
Black and white film strips photography down to light, shadow, and form. It’s an excellent format for learning composition because you can’t rely on color to make an image interesting.
Ilford HP5 Plus (ISO 400) — The most forgiving black and white film available. Extremely wide exposure latitude. Works in almost any light. A single roll (36 exp): approximately $10–$13.
Ilford XP2 Super — A black and white film that develops in standard C-41 chemistry, meaning any color film lab can process it. Convenient if you don’t have access to a specialist black-and-white lab. Approximately $10–$14 per roll.
Traditional black and white films (HP5, Kodak Tri-X) require dedicated black and white chemistry, which adds $3–$8 per roll at the lab. For your first roll, stick with color C-41 to keep costs and complexity down.
ISO — the most important number for beginners
ISO determines your film’s sensitivity to light. Higher ISO = more sensitive = works in lower light but produces more grain.
- ISO 100–200: Bright outdoor conditions only. Fine grain, rich color. Limited indoors.
- ISO 400: The beginner’s choice. Works in most conditions: outdoors, indoors near a window, on an overcast day.
- ISO 800+: Low light specialist. More grain. Niche use for first roll.
Start with ISO 400. You can experiment with other speeds after you’ve finished two or three rolls.
For your first roll: Kodak Ultramax 400 is the most reliable starting point. Wide ISO latitude, punchy colors, widely available. A 3-pack gives you enough film for three full learning sessions. Check current price on Amazon
Step 3: Load the Film Correctly
Loading 35mm film is simple once you’ve done it once, and critical to get right.
- Open the camera back (usually a latch on the left side or bottom).
- Insert the film canister in the left chamber with the flat end up.
- Pull the film leader (the narrow tab at the end of the roll) across the camera back to the take-up spool on the right.
- Attach the leader to the take-up spool. Most SLRs have a slot or teeth to grip it.
- Close the camera back.
- Advance the film two frames (fire the shutter twice, advancing after each) until the frame counter reaches 1.
- Check the rewind knob. As you advance the film, the small knob on the top left of the camera should rotate. If it does, the film is properly engaged. If it doesn’t move, open the back and reload.
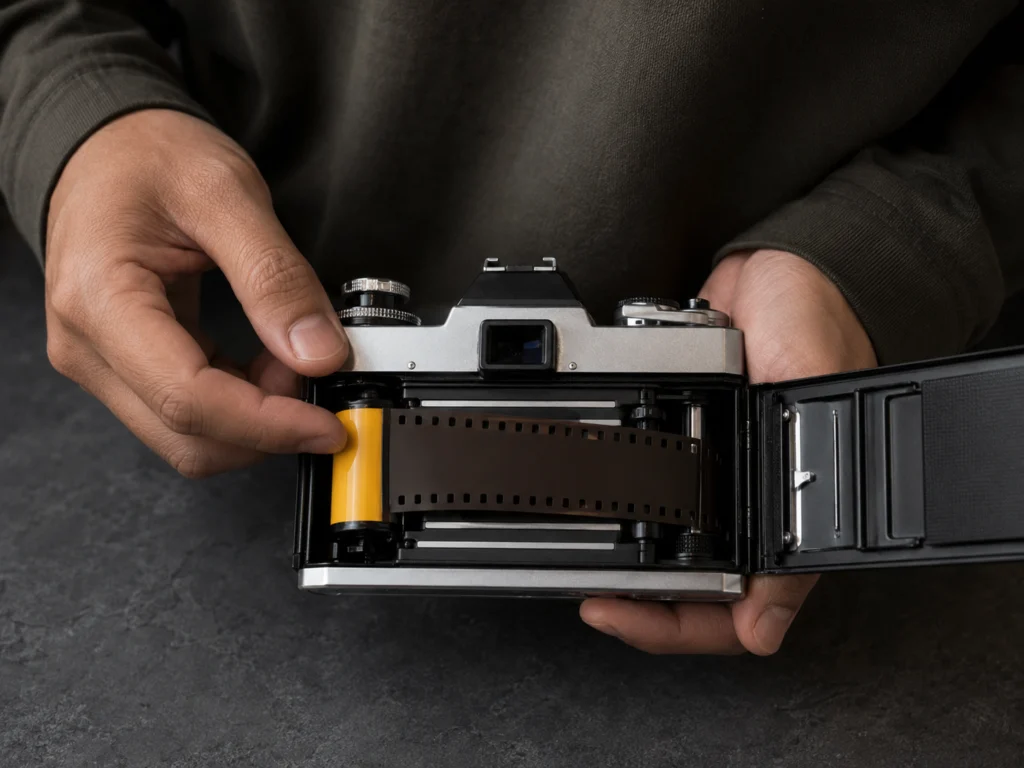
Set your camera’s ISO dial to match your film. If you’re shooting Ultramax 400, set ISO 400. Some older cameras have DX coding (metal contacts inside the film chamber) that sets ISO automatically. Check your camera manual.
The first time loading film feels fiddly. By the third roll, it takes under a minute. Don’t load in direct sunlight. Shade or indoors is fine, but avoid loading in bright sun with the camera back open longer than necessary.
Step 4: Shoot the Roll
You have 36 frames. Use all of them. Here is what actually matters on your first roll:
Shoot in good light. The biggest technical failure on a first roll is underexposure: photos taken in conditions too dark for the film. Outdoors in daylight with ISO 400 film, you almost can’t go wrong. Indoors away from windows, you can get underexposed, muddy images. For your first roll, stay outside or near windows.
Take notes. After each shot, write down what you did: the approximate light conditions, whether you used flash, what you were photographing. When you get your scans back, you’ll be able to connect results to decisions. This is how you actually learn.
Don’t open the camera back. If you open the camera back while film is loaded, you expose the film to light and ruin the frames. If you’re not sure whether the film is fully rewound, assume it isn’t and find the rewind crank first.
Finish the roll. Your first roll is a learning tool. Review results against your notes, understand what worked and what did not, and shoot more. Half-finished rolls sitting in cameras for months are a waste. Shoot the whole thing, develop it, learn from it.
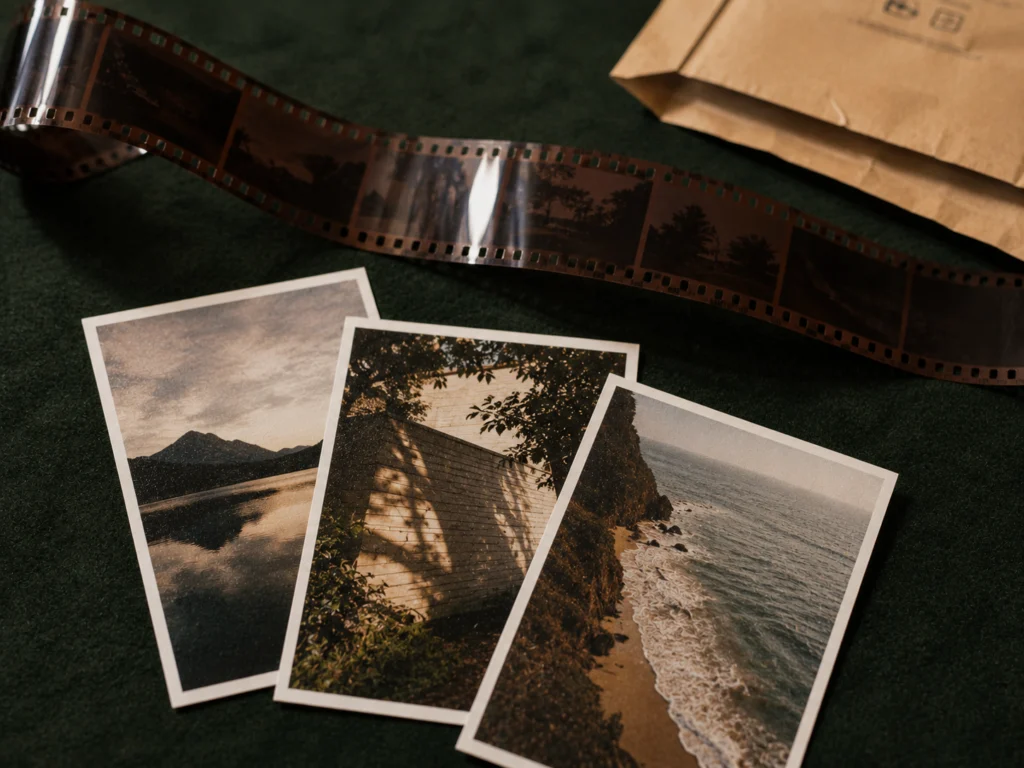
Step 5: Get It Developed
After you’ve shot the full roll, you need to develop it. Two options: take it to a local lab or mail it to an online lab.
Professional lab (recommended)
Film developing costs $12–$25 per roll in 2026. Drugstores like CVS and Walgreens charge $12–$18 per roll but deliver low-resolution scans inadequate for printing or serious editing, and negative handling is inconsistent.
Professional labs charge $15–$25 per roll and provide high-resolution scans, careful negative handling, and faster turnaround.
For beginners, a professional independent lab is worth the extra few dollars. You’re getting scans you can actually do something with, and the negatives are returned to you, a physical record of your work that you can re-scan later at higher resolution if you want.
Mail-in labs are a practical option if there’s no local lab near you. The Darkroom (California) starts at $14/roll for develop and standard scan with prepaid shipping.
Kubus Photo (Brooklyn) offers develop-and-scan from $15/roll. Most mail-in labs return results within 2–5 business days of receiving your film.
Skip the drugstore. CVS and Walgreens do process 35mm C-41 film, but scan quality is generally too low for printing or editing, negative handling is inconsistent, and some locations have quietly discontinued the service. The $3–$5 you save is not worth the risk on your first roll.
If you want to start with a reusable compact camera first: The Kodak Ektar H35N is a half-frame 35mm film camera. Not a disposable, but reusable and manual-free. Compact, simple to use, and gives you 72 shots per 36-exposure roll. Good middle ground between disposable and SLR. Check current price on Amazon
What to Expect From Your First Roll
Most people’s first roll has a mix of well-exposed images and mistakes. Both are useful.
Common first-roll problems and what causes them:
Underexposed (dark, muddy) frames — Shot in too little light for your film’s ISO. Solution: shoot in better light or use a higher ISO film.
Blurry images — Camera shake from slow shutter speeds in low light, or out-of-focus shots with a manual focus camera. Solution: brace the camera, use faster film in dim conditions, practice manual focusing.
Double exposures or blank frames at the start — Usually means the film didn’t catch on loading. The first 2–3 frames are always sacrificed to advance past unexposed leader anyway.
Light leaks (colored streaks) — The camera’s light seals have degraded. Common on older cameras bought without inspection. Usually fixable with new foam seals ($10–$15 kit, applied at home).
Correctly exposed frames with interesting results — This is what you’re looking for. Review them against your notes. If a shot worked, understand why.
The Real Cost of Starting Film Photography
Budget honestly before you start. Film photography is not expensive compared to digital gear, but costs are ongoing rather than one-time.
| Item | Cost |
|---|---|
| Used 35mm SLR with 50mm lens | $40–$100 |
| Film (Kodak Ultramax 400, 3-pack) | $30–$38 |
| Development + scan per roll | $15–$22 |
| First three rolls total (camera + 3 rolls developed) | $115–$204 |
After the camera is purchased, the ongoing cost is approximately $24–$35 per roll (film + development). At two rolls a month, that’s $48–$70/month. That’s the honest number.
One caveat: film prices in 2026 are still moving. Kodak dropped select film prices in late 2025 and early 2026, while Alaris-distributed stocks saw increases of $1–$3 per roll in early 2026.
The ranges above reflect conditions at time of writing. Verify current prices on Amazon or B&H before budgeting. The per-roll cost trend is generally upward, but not uniformly so across all stocks.
Film photography is affordable for a hobby. But it’s not free, and the per-shot cost does affect how you shoot, which is partly the point.
For a deeper look at camera options and a comparison of specific models, see Best Film Cameras for Beginners Under $150 (That Are Actually Worth It).
If you want to test film photography before buying a camera: Fujifilm QuickSnap 2-pack gives you two 27-exposure single-use cameras with built-in flash. No settings, no loading, no risk of error. Good for testing whether film photography appeals to you before investing in a camera. Check current price on Amazon
What Film Photography Teaches You That Digital Doesn’t
This is worth naming because it explains why film is genuinely useful as a practice, not just an aesthetic choice.
Film photography changes how you see, because you have a limited number of shots and each one costs money. You’re forced to slow down and make each shot count.
That enforced intentionality has a practical payoff beyond the images: you learn to compose before you shoot, not after. Digital photography’s infinite undo trains the opposite habit. The feedback loop of film (shoot, wait, see results, adjust) is slower but more instructive.
The grain, color rendering, and tonal qualities of film are genuinely different from digital. Some people prefer them. Some don’t.
But the process of shooting film is distinct from digital in ways that make it valuable as an offline activity: something to do with your hands and your attention that doesn’t involve a screen.
FAQ
No. Point-and-shoot film cameras handle all settings automatically. Manual SLRs offer more control but also have automatic or semi-automatic modes. You can start on full auto and learn manual exposure over time. That said, learning to control aperture and shutter speed yourself is what makes film photography genuinely educational, and it transfers directly to any future digital photography too.
Relative to other hobbies, it’s moderate. The main costs are film (~$10–$13/roll) and development ($15–$22/roll). A used camera costs $40–$100 one time. At one roll per month, the ongoing cost is roughly $25–$35/month. That’s comparable to other physical hobbies. The costs do go up if you shoot frequently or use premium film stocks. Film prices in 2026 are still variable. Verify current prices before budgeting.
Amazon stocks Kodak Gold 200 and Ultramax 400 reliably. B&H Photo, Adorama, and Freestyle Photographic are specialty retailers with a wider selection. Locally, some camera shops and Urban Outfitters locations stock basic film. Avoid buying film from Amazon third-party sellers at inflated prices. If the price is significantly higher than the standard retail range, look elsewhere.
At a local professional lab, typically 1–3 business days for develop-and-scan. Mail-in labs add transit time, so expect 5–10 days total. Rush processing is available at most labs for an additional $5–$15 per roll.
Maybe. Older cameras (1970s–1980s) often have degraded light seals (foam around the camera back) that cause light leaks. The meter may also need a battery type that’s no longer standard (some older cameras used mercury batteries). Before running a roll through a thrift store find, check: (1) does the shutter fire at all speeds? (2) does the rewind knob turn when you advance? (3) are there obvious gaps or degraded foam around the camera back? If in doubt, run a cheap test roll before committing good film to it.
You expose the film to light and ruin some or all of your frames. The amount of damage depends on how far you’ve rewound. If you’ve rewound the film back into the canister, opening the back does minimal damage. If there’s still film out of the canister, light will hit it and fog those frames. Never open the camera back without confirming the film is fully rewound first.
It’s one of the more satisfying ones. The process from loading a camera to holding a set of physical negatives is entirely tactile. No screen required until you receive your scans. The deliberateness of working with 36 frames is a specific antidote to the infinite scroll mindset. Most people who try it find the enforced slowness more satisfying than frustrating, especially once they see the results from their first developed roll.
Keep Reading
- Best Disposable Cameras in 2026: Fujifilm vs. Kodak vs. Ilford
- Best Film Cameras for Beginners Under $150 (That Are Actually Worth It)
- What Are Analog Hobbies? A Starter List for People Tired of Screens
We research screen-free habits, analog hobbies, and offline routines so you can spend less time scrolling and more time doing things that actually feel good. Every article on this site is based on primary research and verified sources, not recycled wellness advice.
Learn more on our About page.
Sources referenced in this article:
- Serrano Rey Enterprises (2026). Why Film Photography Is Surging in 2026: 7 Market Trends. https://www.serranorey.com/blogs/news/why-film-photography-is-surging-in-2026-7-market-trends-driving-wholesale-film-demand
- Kubus Photo Service (2026). Film Photography for Beginners: 2026 Starter Guide. https://www.kubusphoto.com/blog/film-photography-for-beginners
- Kubus Photo Service (2026). Film Developing Cost Guide 2026. https://www.kubusphoto.com/blog/film-developing-cost-guide-2026
- Pellica (2026). Fujifilm Superia Premium 400: Not Dead Yet, But For How Long? https://pellica.app/blog/fujifilm-superia-premium-400-available-2026/
- Amateur Photographer (2026). How to Get Started in Film Photography — A Beginner’s Guide. https://amateurphotographer.com
- Remi Portrait (2026). 35mm Film Photography Explained for Beginners. https://remi-portrait.com/35mm-film-photography-explained-for-beginners/